

Managing Groups
This page covers the full lifecycle of an access group - from creation through editing and deletion.
Path: Access → Groups tab
Creating a group
Open the Groups tab
Navigate to the Access module and click the Groups tab.
Open the Create Group dialog
Click the Add (+) button in the toolbar. The Create Group dialog opens.
Fill in the group details
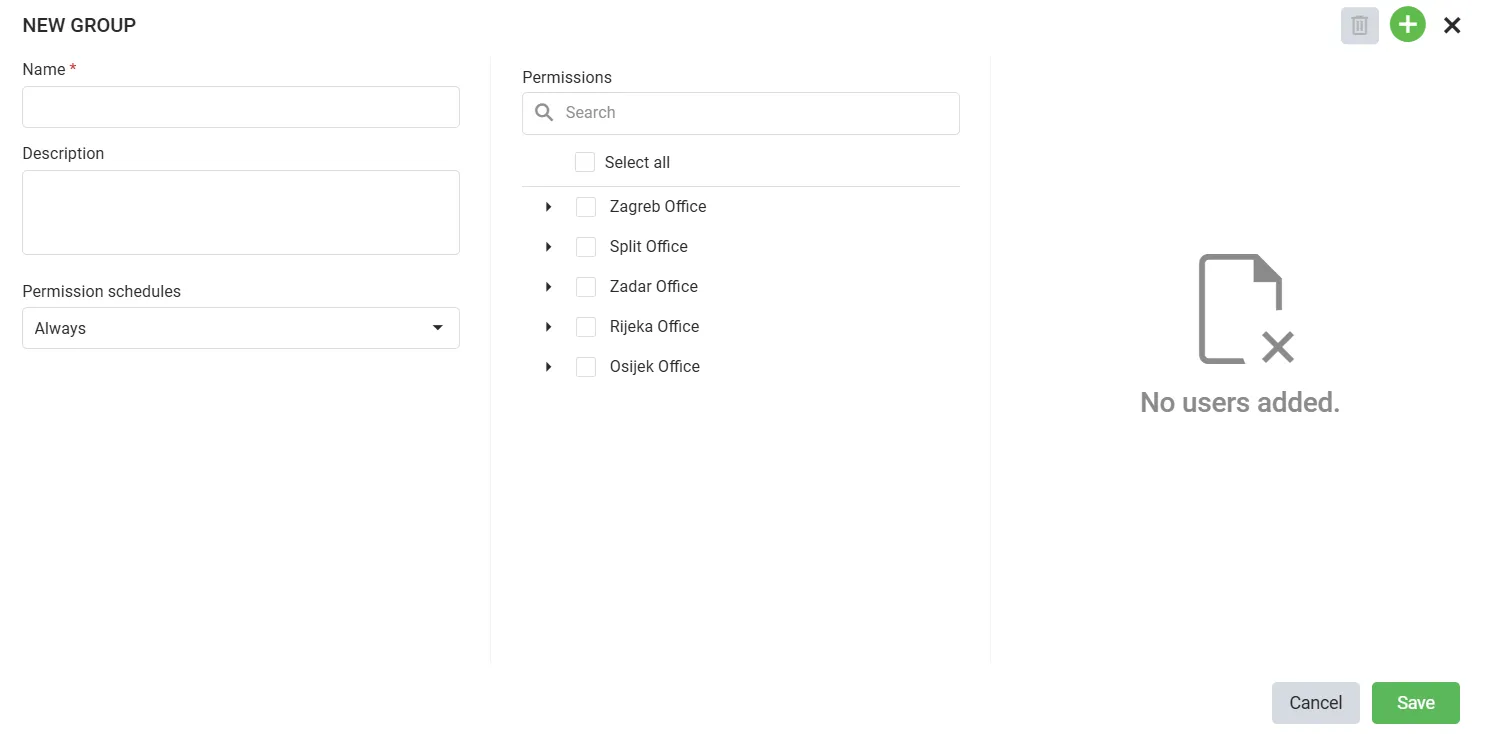
| Field | Required | Description |
|---|---|---|
| Name | Yes | A clear, unique name - e.g. “Office Floor 2 - Day Shift”. Used to identify the group in user profiles and reports |
| Description | No | Optional notes useful for auditing purposes |
| Permission schedules | No | Controls when this group’s access is active. Defaults to Always - select a schedule to restrict access to specific days and hours |
Select permitted locations
In the Permissions panel, expand the location tree and tick each location this group should grant access to. Sub-locations can be revealed by expanding parent nodes.
Save the group
Click Save. The group is created. To add users, open each user’s edit dialog in the Users tab and assign them to this group from there.
Editing a group
Select a group in the list and click the Edit button in the toolbar (only available when exactly one group is selected). You can change the name, description, locations, and schedules. Click Save to apply.
Deleting a group
Select the group and click the Delete button in the toolbar, then confirm.
Deletion is permanent
- All users in the group immediately lose the location access rights granted by this group.
- The group’s schedule assignments are removed.
- This cannot be undone. Verify group membership before deleting.