

Schedules
Schedules are reusable time-window definitions that you attach to other features - most commonly to notifications and access control rules - to control when those features are active. Once created, a schedule can be referenced by any number of notification rules or report configurations.
Path: Settings → Schedules
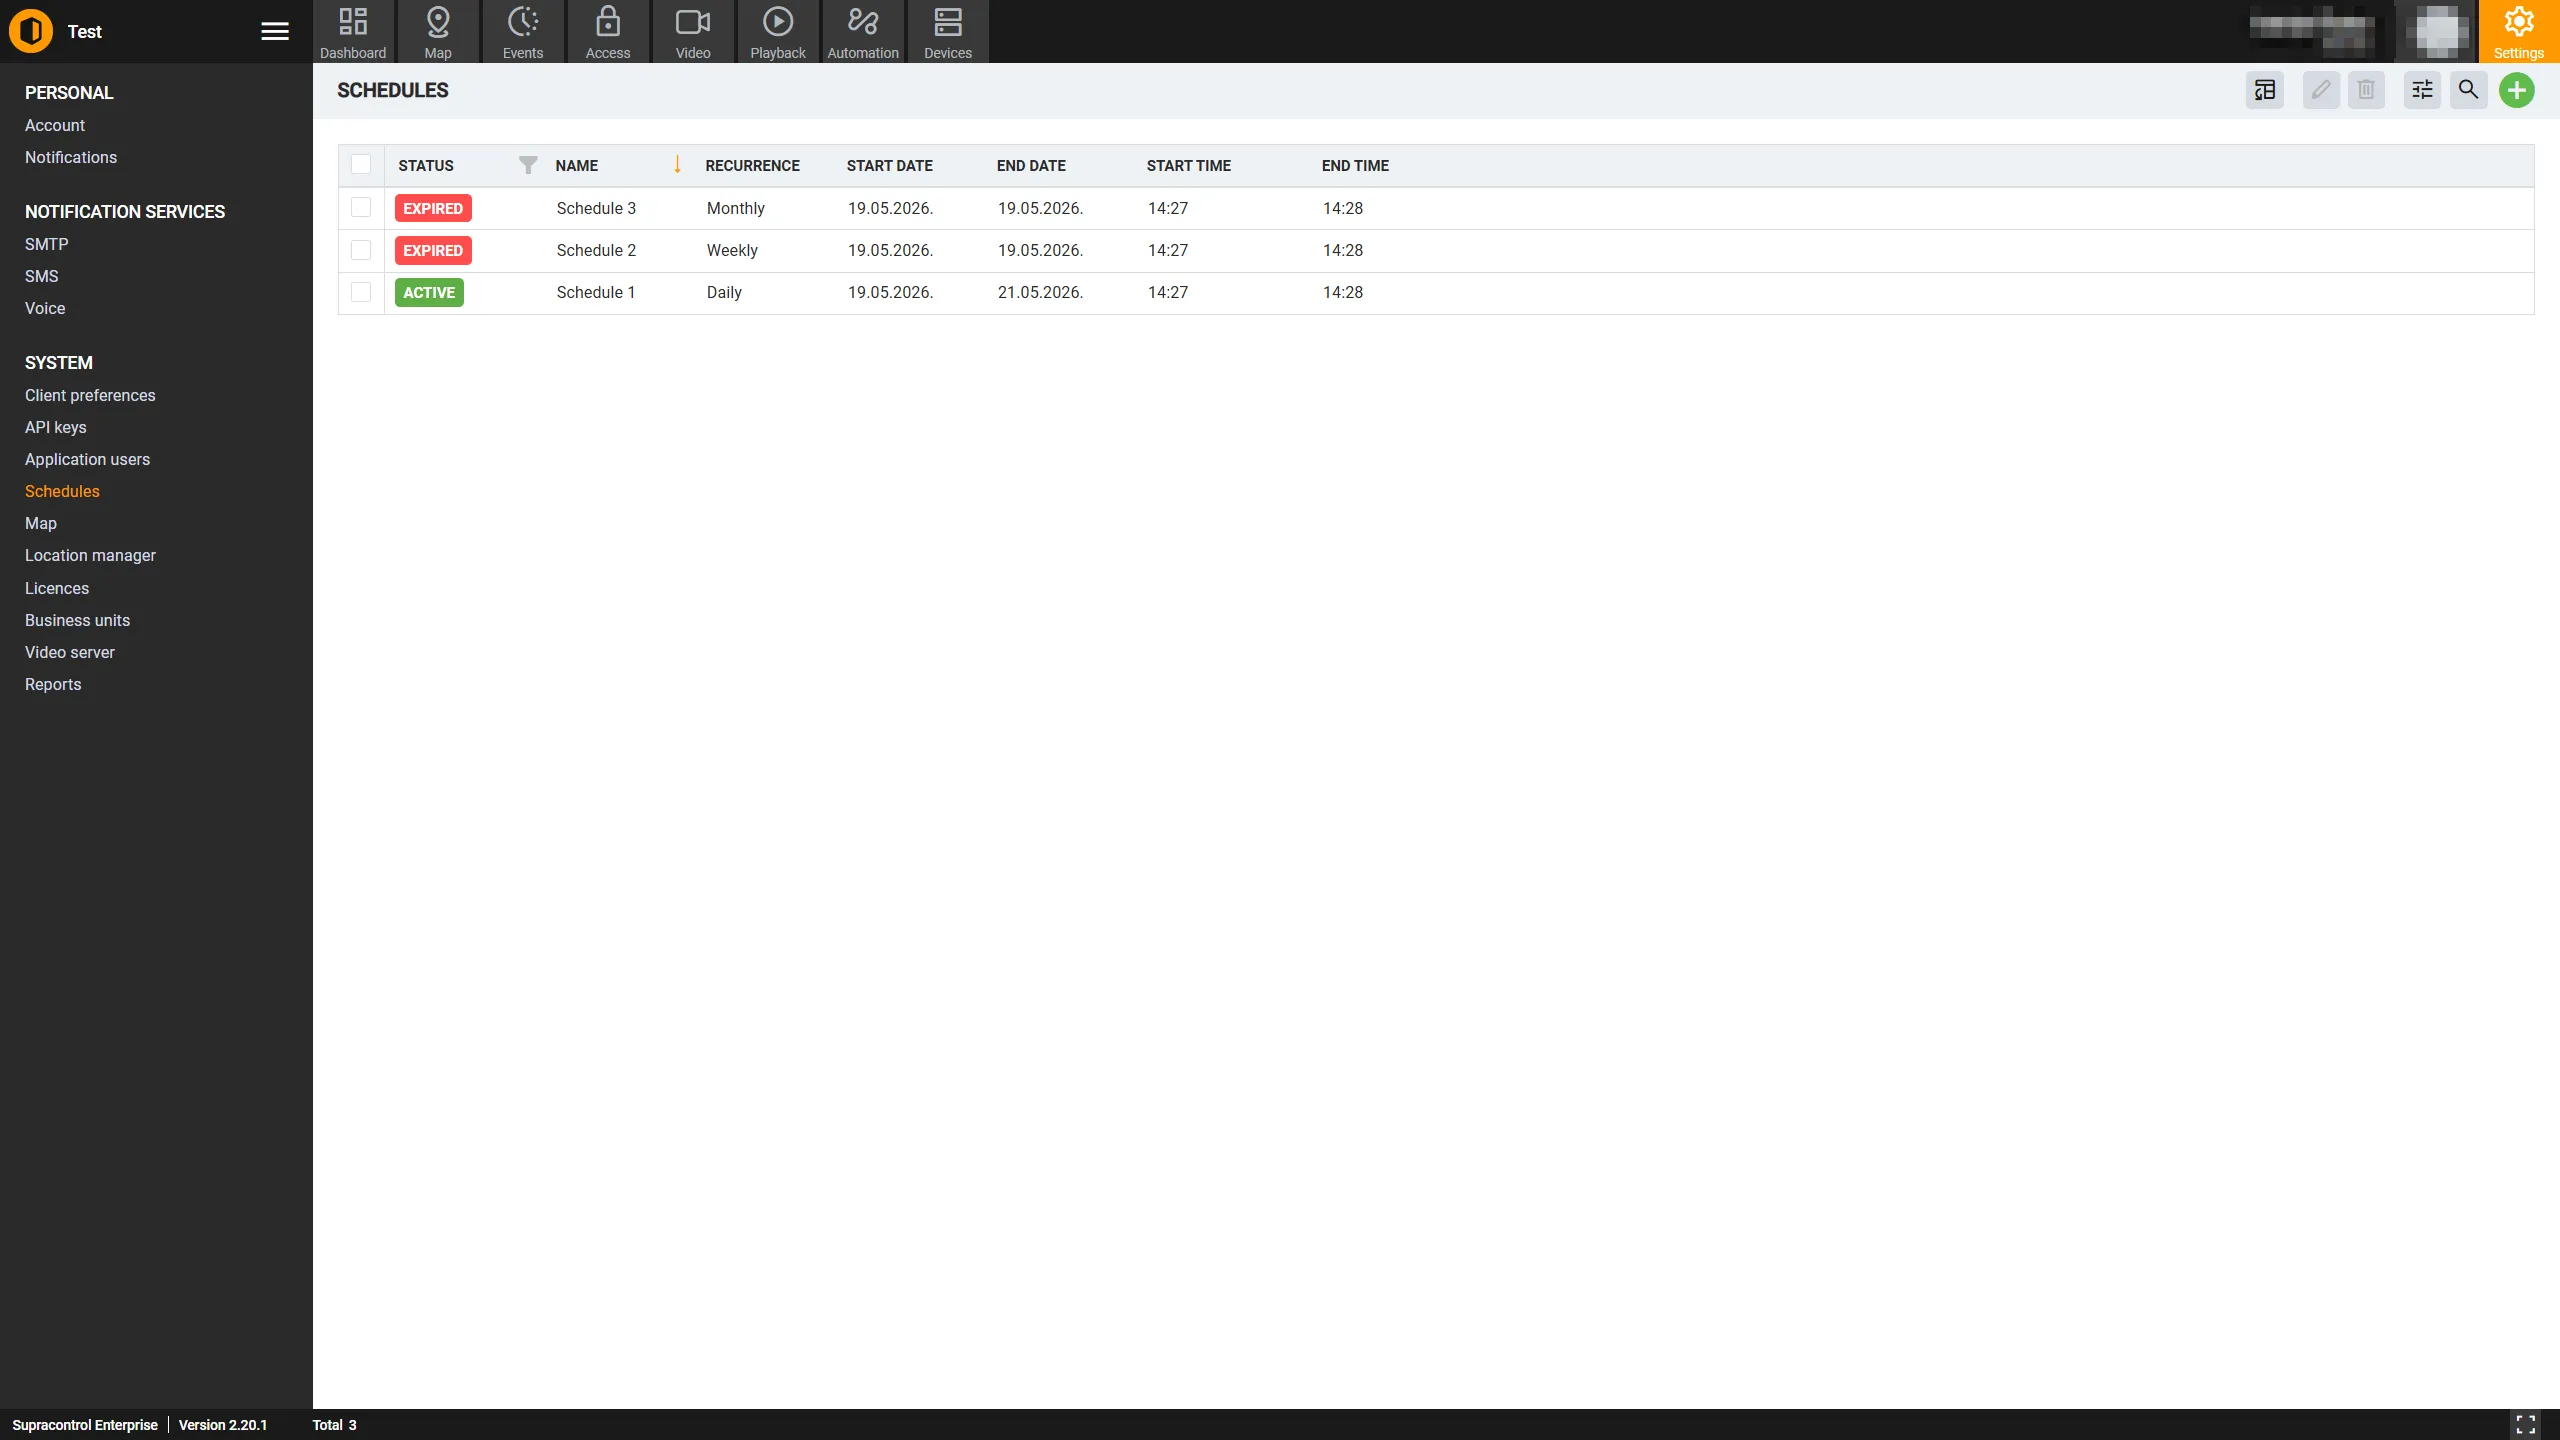
Schedule status
| Status | Description |
|---|---|
| Active | The current date/time falls within the schedule’s date range and active time window |
| Inactive | The current time is outside its defined hours, or it has not started yet |
| Expired | The schedule’s end date has passed. It will never fire again until the end date is updated |
Recurrence types
| Recurrence | Description |
|---|---|
| Daily | Active every day between the start and end time |
| Weekly | Active on selected days of the week between the start and end time |
| Monthly | Active on a specific day of the month between the start and end time |
| Once | A one-time window with specific start and end dates and times |
Toolbar
| Icon | Tool | Description |
|---|---|---|
 | Add Schedule | Opens the dialog to create a new schedule |
 | Export to Excel | Downloads the schedule list as an Excel file. Disabled when there is no data |
 | Edit | Opens the edit dialog for the selected schedule. Disabled when zero or more than one row is selected |
 | Delete | Deletes the selected schedule. Disabled when zero or more than one row is selected |
 | Table Settings | Opens the column visibility panel. Disabled when there is no data |
A search bar is available to filter schedules by name.
Create a schedule
Open the Schedules section
Go to Settings → Schedules.
Open the creation dialog
Click the Add Schedule button in the toolbar.
Fill in the schedule details
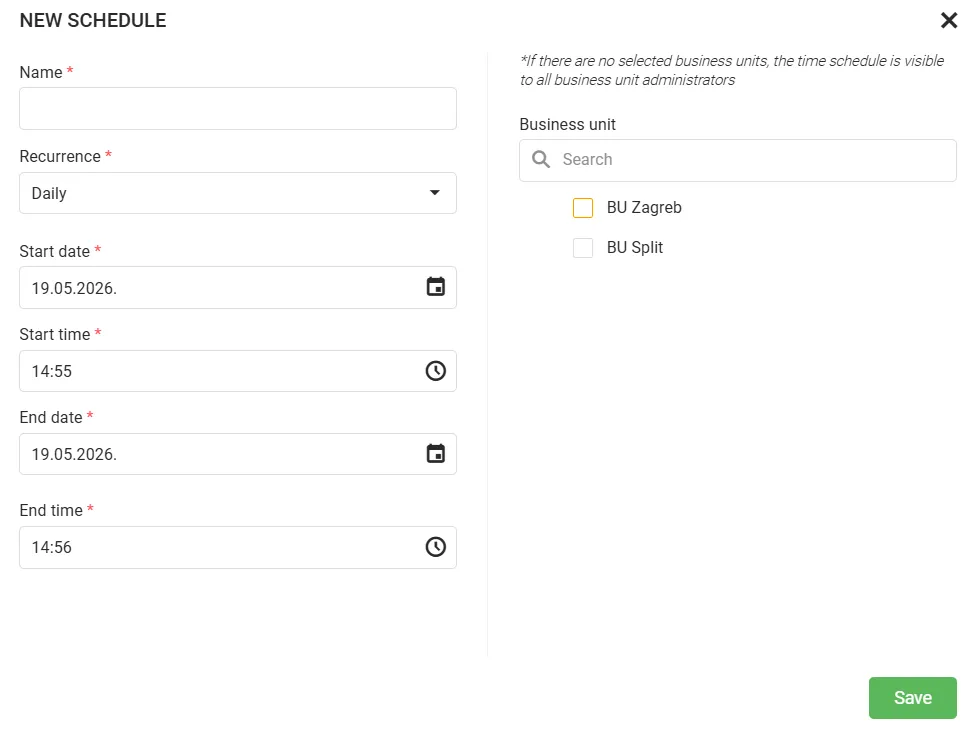
| Field | Required | Description |
|---|---|---|
| Name | Yes | A descriptive name - e.g. “Night Shift” or “Weekend Hours” |
| Recurrence | Yes | How often the schedule repeats: Daily, Weekly, Monthly, or Once |
| Start date | Yes | The calendar date from which the schedule becomes valid |
| Start time | Yes | The time of day the active window opens (HH:mm) |
| End date | Yes | The calendar date after which the schedule expires. Leave blank for an open-ended schedule |
| End time | Yes | The time of day the active window closes (HH:mm) |
Set business unit visibility (optional)
By default the schedule is visible to all Business Unit administrators. To restrict it to specific BUs, use the Business unit search panel on the right side of the dialog and tick the BUs that should have access to this schedule.
Save
Click Save to create the schedule. It appears in the list with its calculated status (Active, Inactive, or Expired).
Edit a schedule
Select the schedule
Click the schedule row you want to modify.
Open the edit dialog
Click Edit in the toolbar. The dialog opens with the current values pre-filled.
Save changes
Update the required fields and click Save, or Cancel to discard.
Editing active schedules
Editing a schedule already assigned to active notifications or reports takes effect immediately. Any active time windows will reflect the updated configuration at their next evaluation.
Delete a schedule
Select the schedule
Click the schedule row you want to remove.
Delete and confirm
Click Delete in the toolbar. In the confirmation dialog, click Confirm to proceed or Cancel to abort.
Deleting referenced schedules
If the deleted schedule was attached to a notification or access rule, that rule will no longer have a time restriction and may behave differently. Review any notifications or rules that used the deleted schedule after deletion.
Business unit scope
- Administrators can create global schedules (no BU assigned) and BU-scoped schedules, and can edit both types
- BU Admins can create schedules only within their own Business Unit. Global schedules are visible but read-only for BU Admins