

Creating a Notification
This guide walks you through creating a new notification rule from start to finish. A notification rule defines what events to watch, who to alert, and how to deliver the alert.
Path: Settings → Application Notifications → click Add
Before you start
Make sure the delivery channels you plan to use are configured:
| Channel | Required setup |
|---|---|
| Configure SMTP in Settings → SMTP | |
| SMS | Configure the SMS gateway in Settings → SMS |
| Voice | Configure the voice provider in Settings → Voice |
| Schedules | Create the required schedules in Settings → Schedules before creating the notification |
Creating a notification
Open the Create dialog
Go to Settings → Application Notifications and click the Add button in the toolbar. The New Notification dialog opens with three tabs: General, Alarm Events, and Schedule.
General tab - fill in the basic details
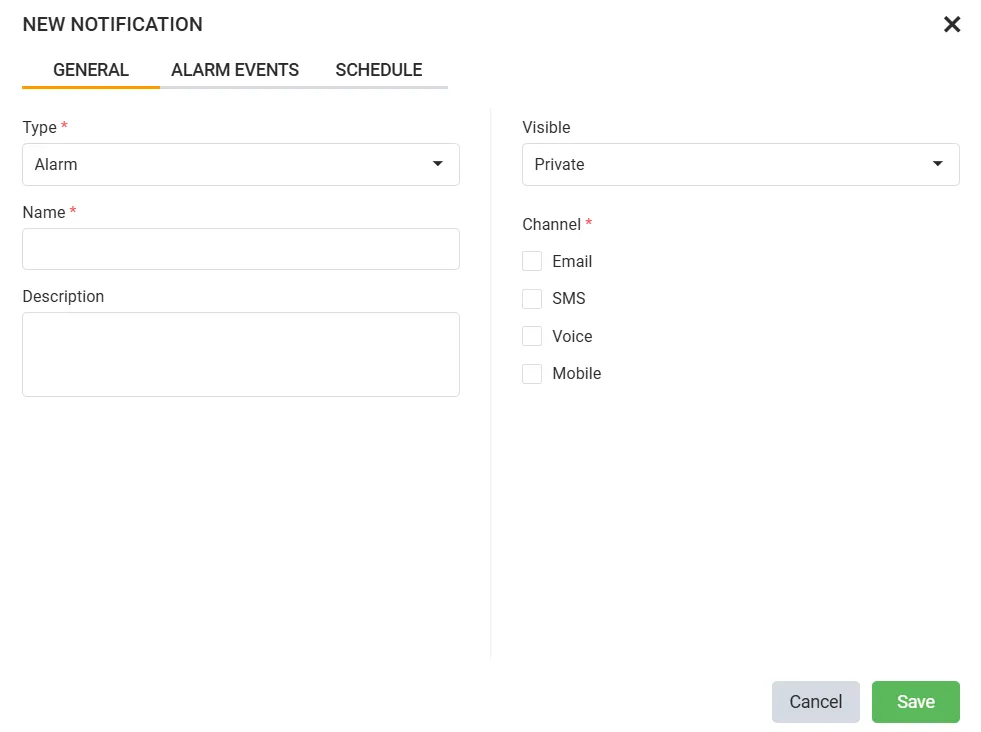
| Field | Required | Description |
|---|---|---|
| Type | Yes | Choose the notification type: Alarm, Audit, or System. Cannot be changed after saving. The Audit option is only visible if your role is authorised for Audit notifications |
| Name | Yes | A descriptive name for the rule - e.g. “Front Door Alarm - Email Alert” |
| Description | No | Optional longer description explaining the purpose of this notification |
| Visible | No | Private - visible only to you. Public - visible to all users with access to the relevant locations |
| Channel | Yes | Tick at least one delivery channel: Email, SMS, Voice, or Mobile. Each channel must be configured in Settings before it can deliver alerts |
Alarm Events tab - define what activates the notification
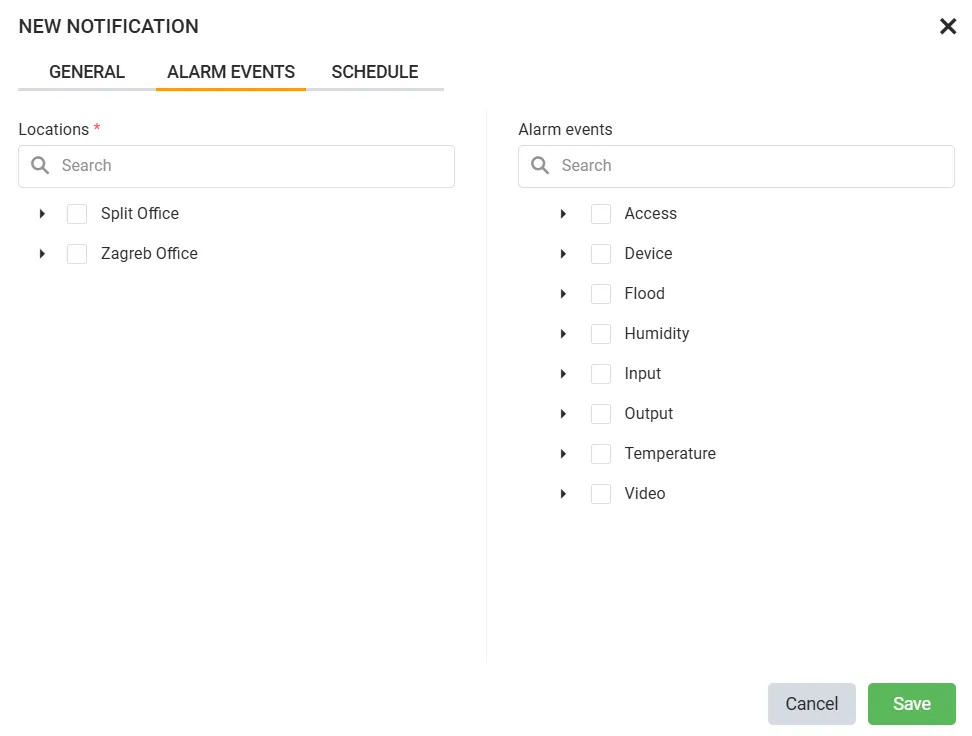
Select which locations and alarm events should trigger this notification:
| Panel | Required | Description |
|---|---|---|
| Locations | Yes | Select one or more locations to monitor. The notification fires only for events from these locations |
| Alarm events | Yes | Expand the event tree and tick the categories to watch - Access, Device, Flood, Humidity, Input, Output, Temperature, or Video. Expand a category to select specific sub-events |
Schedule tab - control when and who
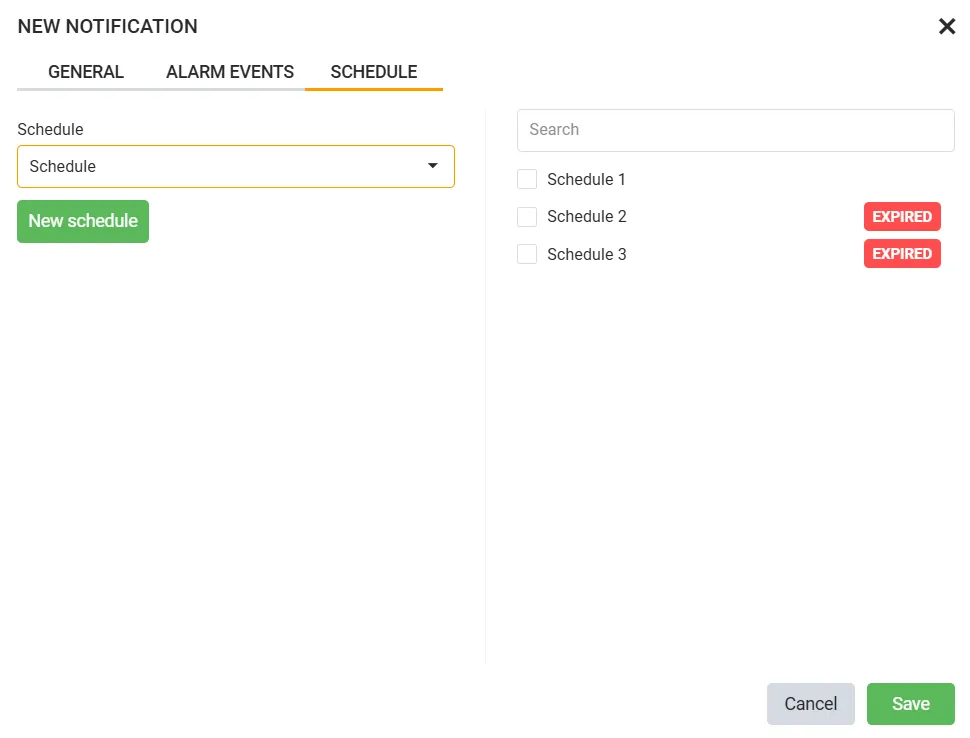
Select which schedule controls when this notification can fire:
| Option | Description |
|---|---|
| No schedule (always active) | Leave the dropdown empty - the notification fires whenever a matching event occurs, at any time |
| Assign a schedule | Select a schedule from the dropdown or the list on the right. The notification fires only during that schedule’s active windows |
Click New schedule to create a schedule inline without leaving this dialog. Schedules marked EXPIRED are past their end date and will not fire.
Schedules are created and managed in Settings → Schedules.
Save
Review all tabs to ensure the configuration is correct, then click Save. The notification appears in the list with status Active or Inactive depending on whether the current date/time falls within any assigned schedule.
What happens next
Once saved, the notification begins monitoring its triggers immediately. When a matching event occurs during an active schedule window, alerts are sent to all recipients via all enabled channels. You can track delivery results in Delivery Stats - see Notification Delivery Statistics.