

Managing Users
This page covers the full lifecycle of an access user - from initial creation through editing, disabling, and deletion.
Path: Access → Users tab
Creating a user
Open the Users tab
Navigate to the Access module and click the Users tab.
Open the Create User dialog
Click the Add (+) button in the toolbar. The Create User dialog opens with four tabs.
General tab - enter basic information
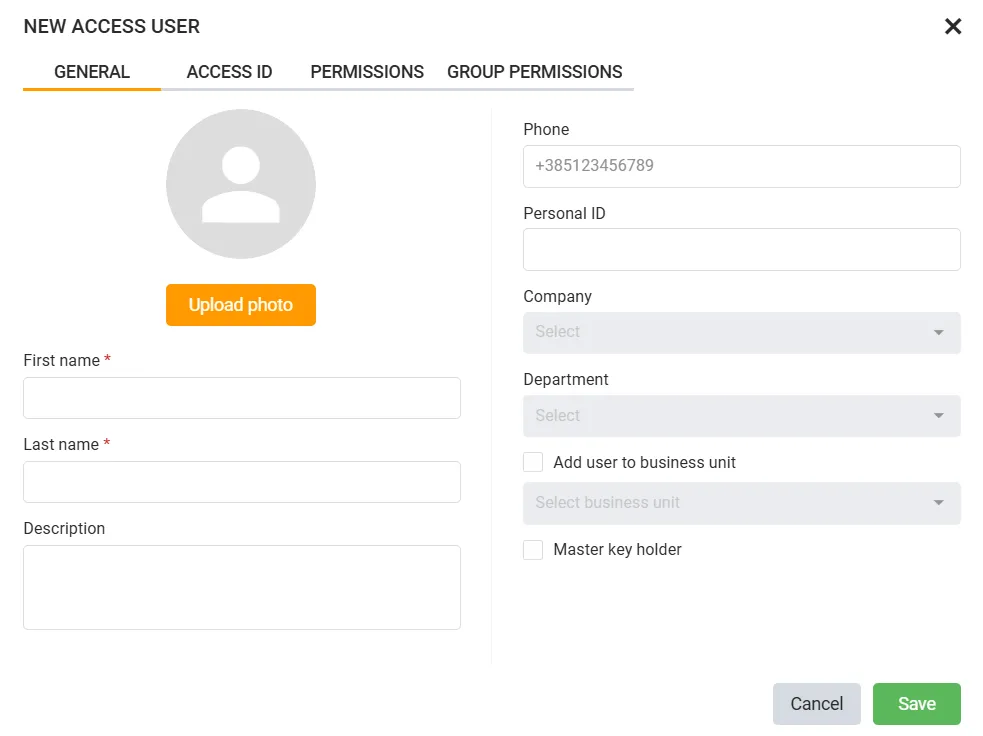
| Field | Required | Description |
|---|---|---|
| First name | Yes | The user’s first name |
| Last name | Yes | The user’s last name |
| Description | No | Optional notes about this user |
| Phone | No | Contact phone number (e.g. +385123456789) |
| Personal ID | No | An internal identifier such as an employee number |
| Company | No | The company this user belongs to |
| Department | No | The department within the company |
| Add user to business unit | No | Tick to assign the user to a Business Unit, then select it from the dropdown |
| Master key holder | No | Grants this user master key access rights |
You can also upload a profile photo using the Upload photo button.
Access ID tab - credentials and validity
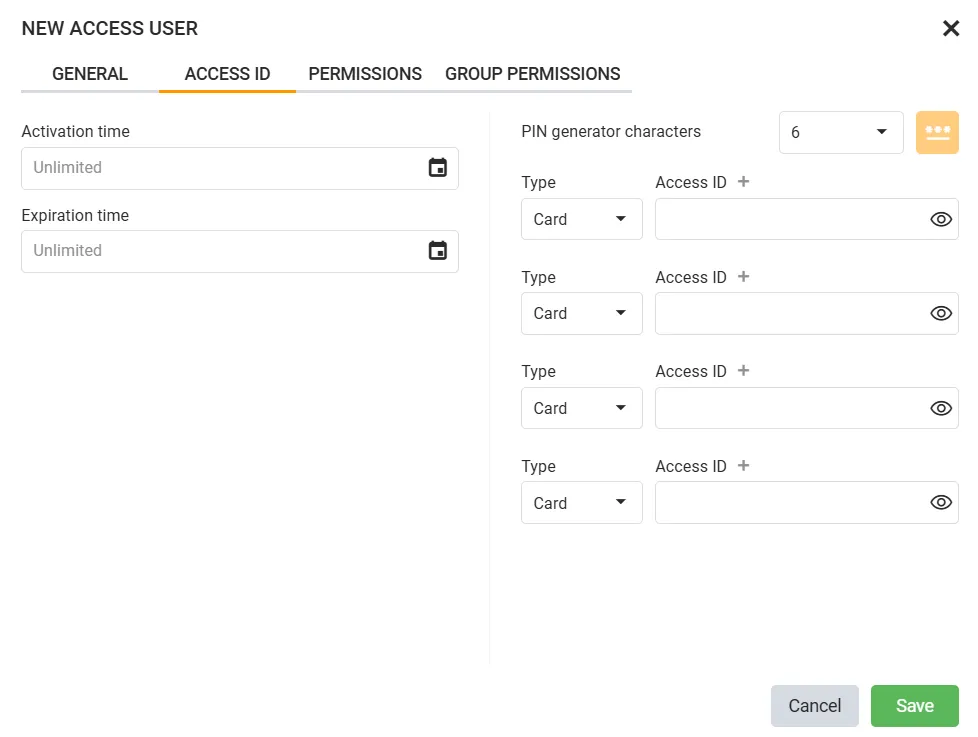
| Field | Description |
|---|---|
| Activation time | Optional date from which this user’s credentials become active. Leave blank for immediate activation |
| Expiration time | Optional date after which credentials expire automatically. Leave blank for no expiry |
| Type | The credential type: Card (RFID card or fob) or PIN (numeric code) |
| Access ID | The identifier value for that credential. Up to four credentials can be assigned |
Use the PIN generator to automatically create a secure PIN for PIN-type credentials.
Permissions tab - individual location access
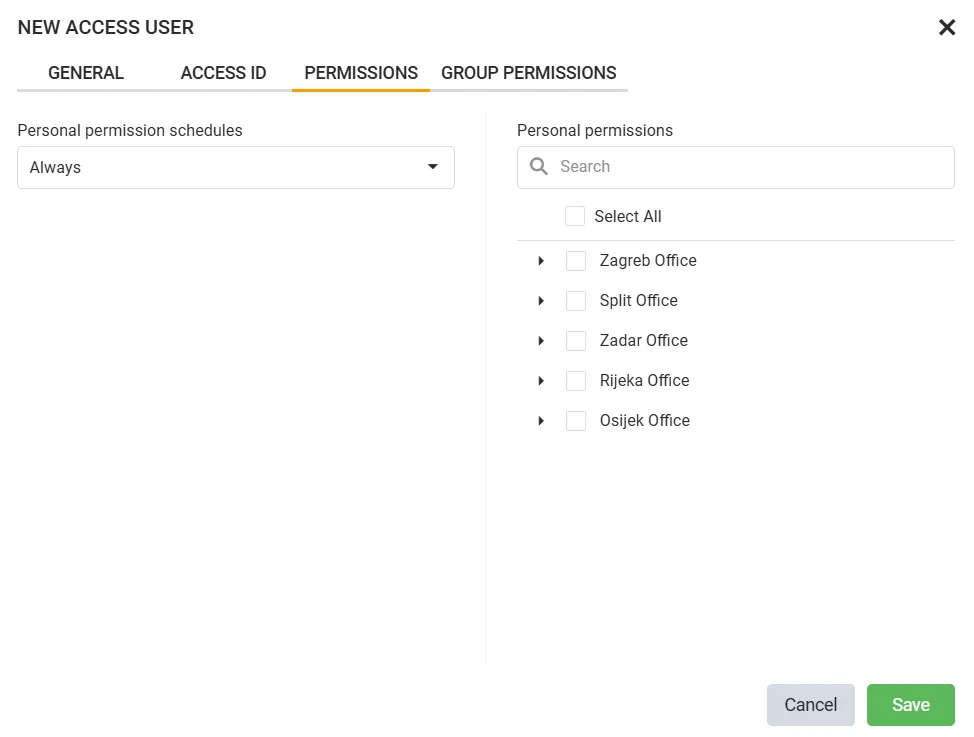
Use this tab to grant the user direct location access outside of any group memberships:
| Field | Description |
|---|---|
| Personal permission schedules | Controls when these individual permissions are active. Defaults to Always |
| Personal permissions | Expand the location tree and tick locations to grant direct access |
Group Permissions tab - group memberships
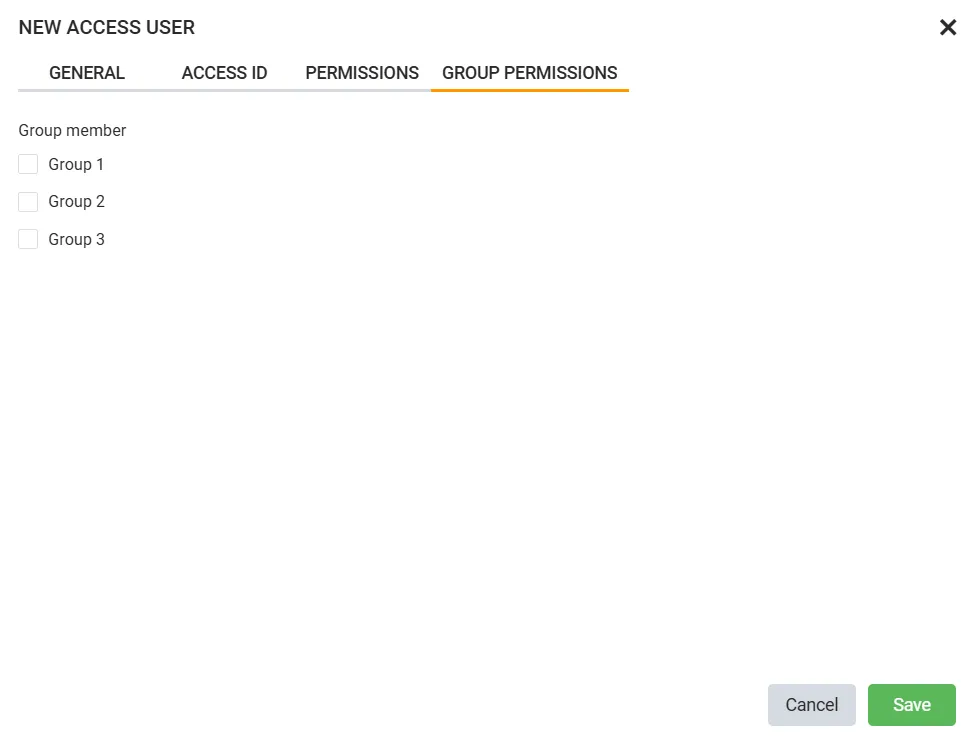
Tick the checkboxes next to any groups this user should be a member of. The user inherits all location access rights defined on those groups.
Save
Click Save to create the user. Access rights take effect immediately.
Editing a user
Select a user in the list and click the edit action (pencil icon on the row). All fields remain editable - name, email, phone, validity period, groups, cards, and roles.
Click Save to apply changes. Changes take effect immediately.
Disabling and enabling a user
Disabling a user immediately blocks their access without removing any of their data.
- To disable: select the user and click Disable in the toolbar, then confirm.
- To re-enable: select the disabled user and click Enable in the toolbar.
Deleting a user
Select the user, click Delete in the toolbar, and confirm in the dialog.
Deletion is permanent
All of the user’s access data - group memberships, card assignments, and event history associations - are removed. This cannot be undone.
- You cannot delete yourself
- You cannot delete a user who is the system Owner