

Managing Business Units
This guide covers the practical steps for creating and managing Business Units. For a conceptual explanation of what Business Units are and how they work, see Understanding Business Units.
Path: Settings → Business Units
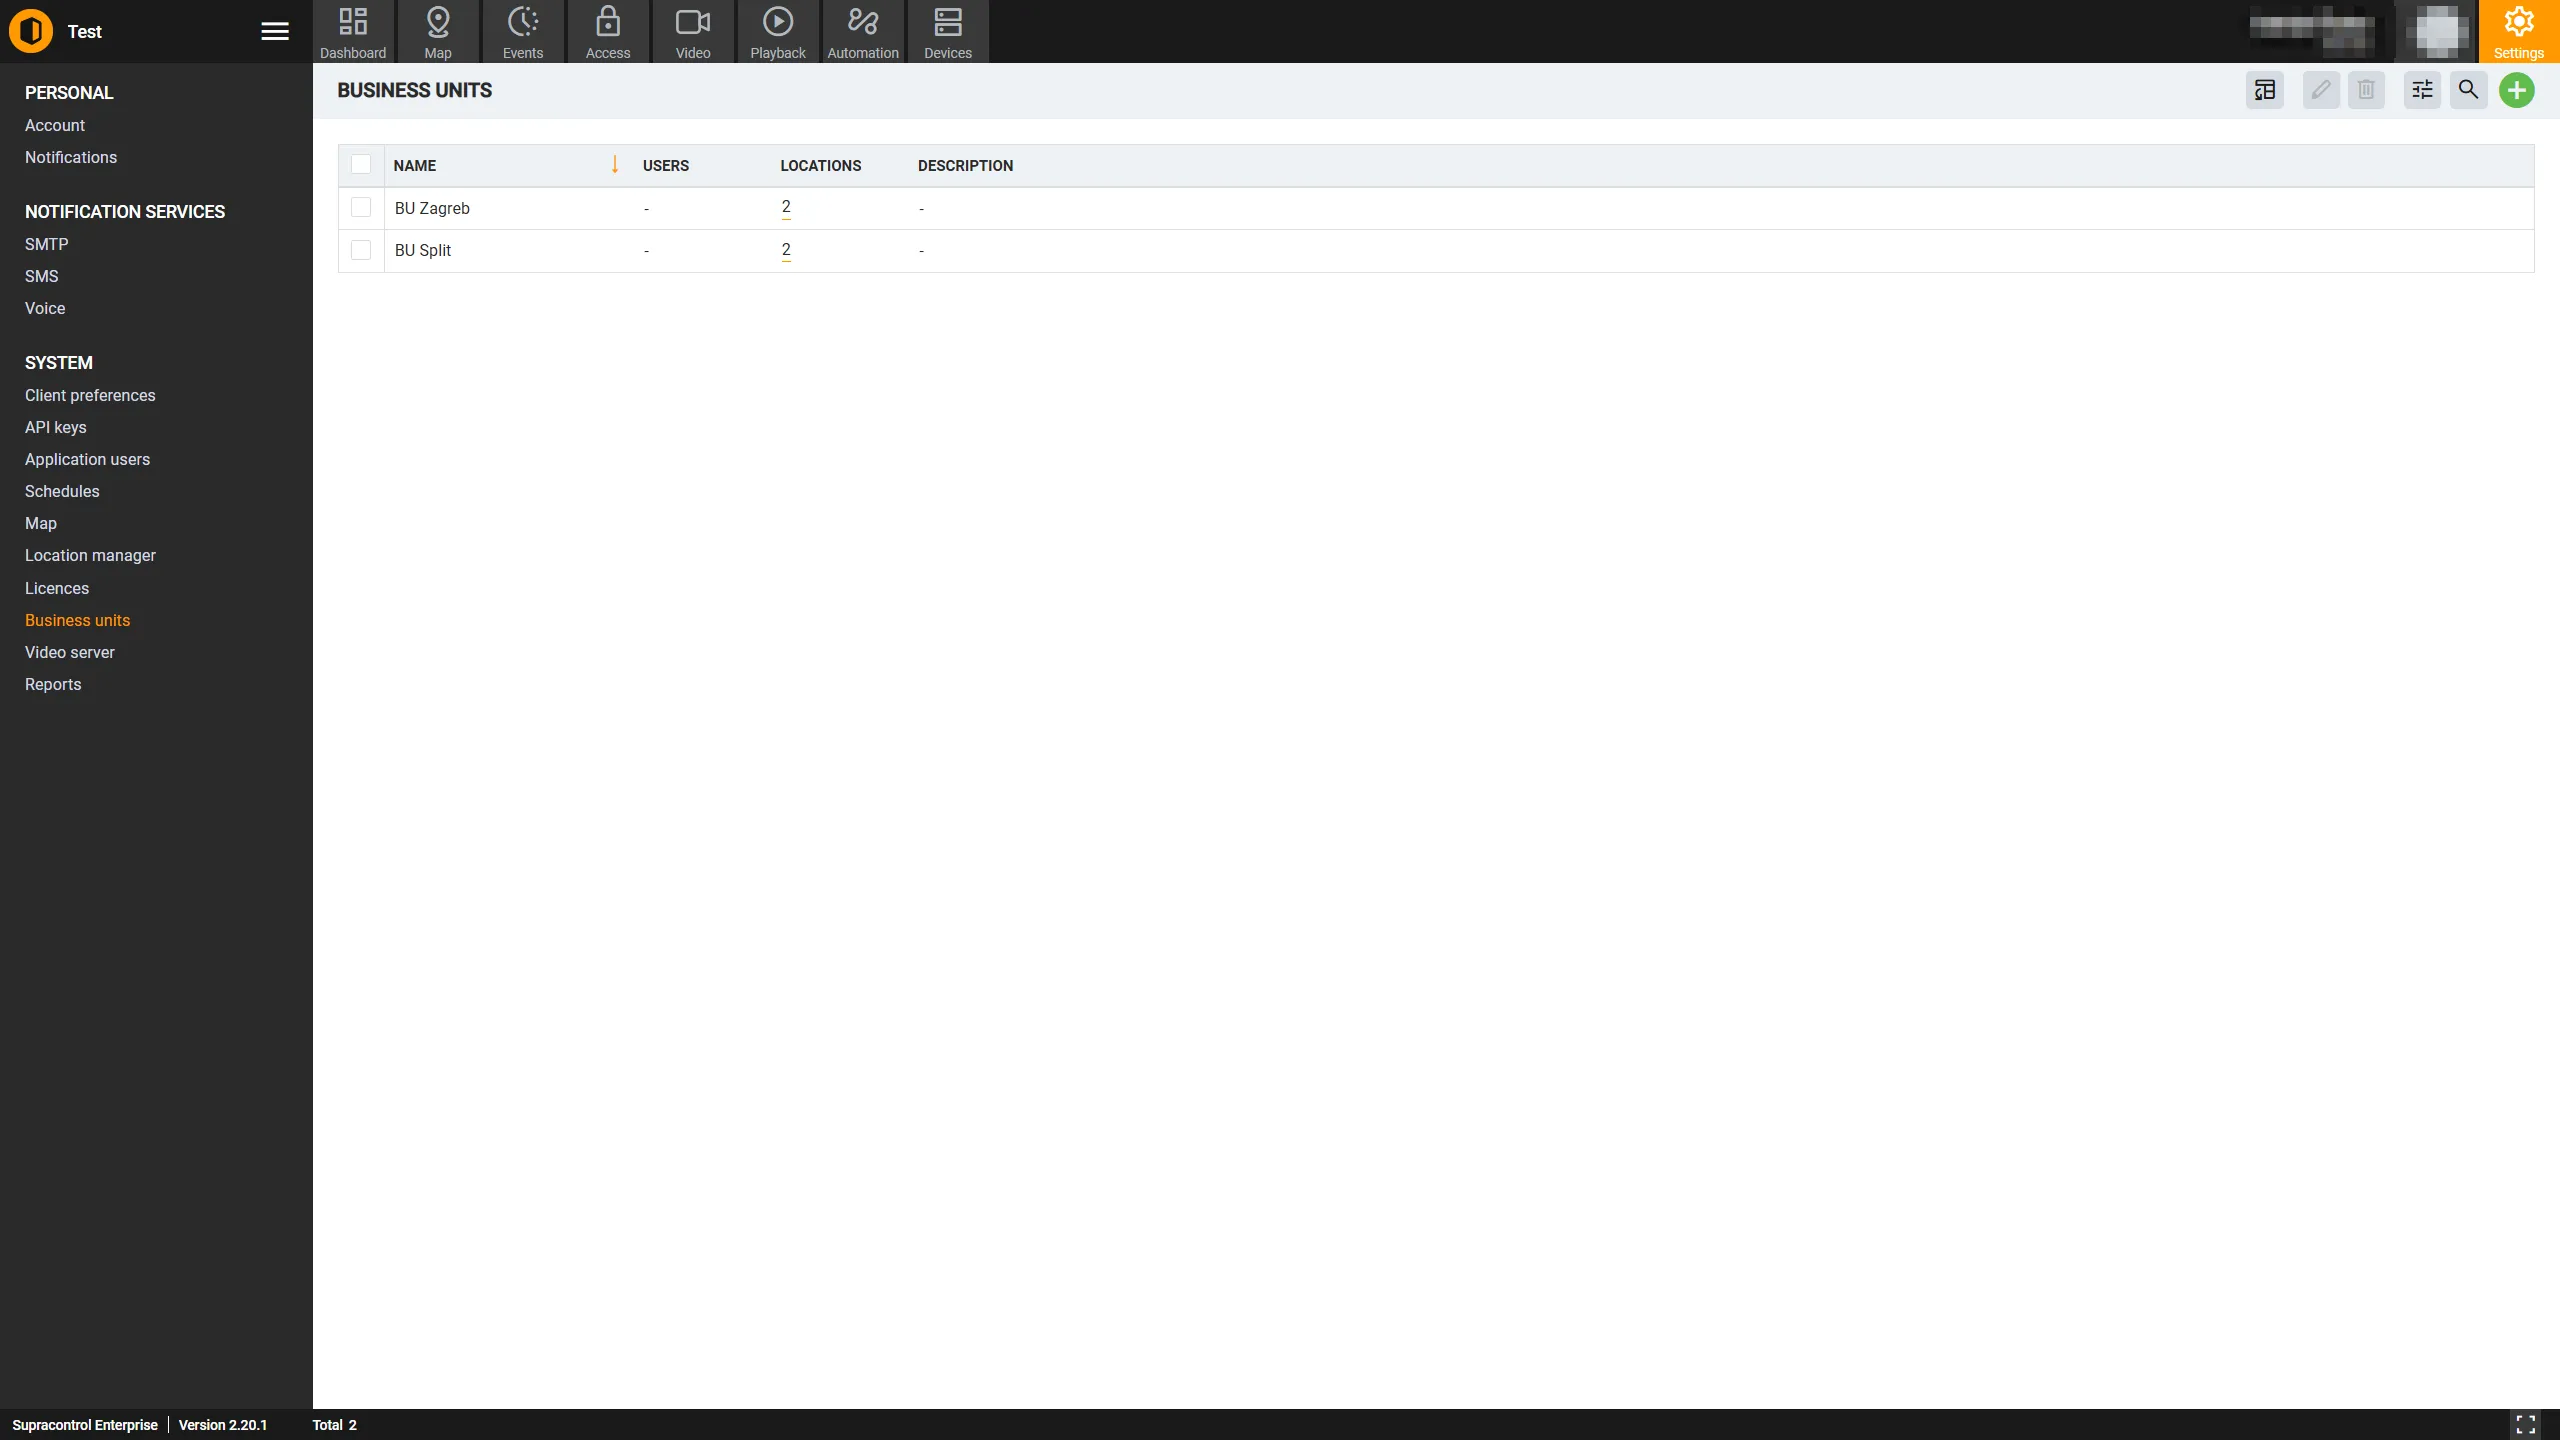
Toolbar
| Icon | Tool | Description |
|---|---|---|
 | Add Business Unit | Opens the dialog to create a new Business Unit |
 | Export to Excel | Downloads the Business Unit list as an Excel file. Disabled when there is no data |
 | Edit | Opens the edit dialog for the selected Business Unit. Disabled when zero or more than one BU is selected |
 | Delete | Deletes the selected Business Unit. Disabled when zero or more than one BU is selected |
 | Table Settings | Opens the column visibility panel. Disabled when there is no data |
A search bar is available to filter BUs by name.
Create a Business Unit
Open the Business Units section
Go to Settings → Business Units.
Open the creation dialog
Click the Add Business Unit button in the toolbar. The Create Business Unit dialog opens with two tabs: General and Users.
General tab - configure the BU
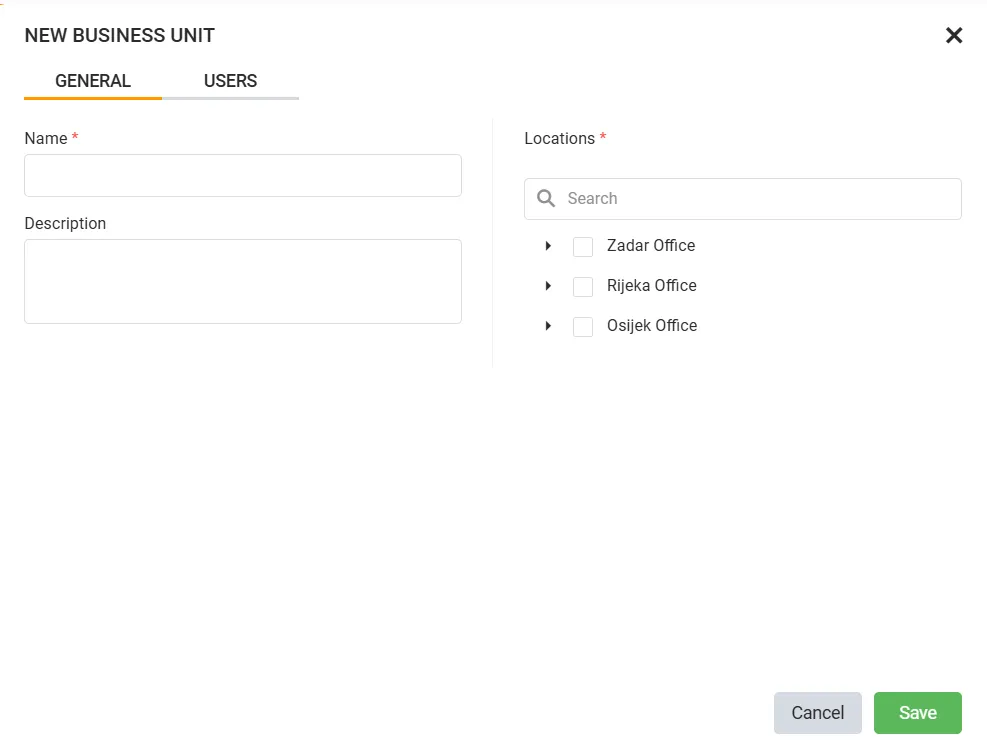
| Field | Required | Description |
|---|---|---|
| Name | Yes | A descriptive name for the Business Unit - e.g. “North Campus” or “Finance Dept” |
| Description | No | Optional free-text description |
| Locations | Yes | Use the search field and location tree to select which locations belong to this BU |
Users tab - assign members
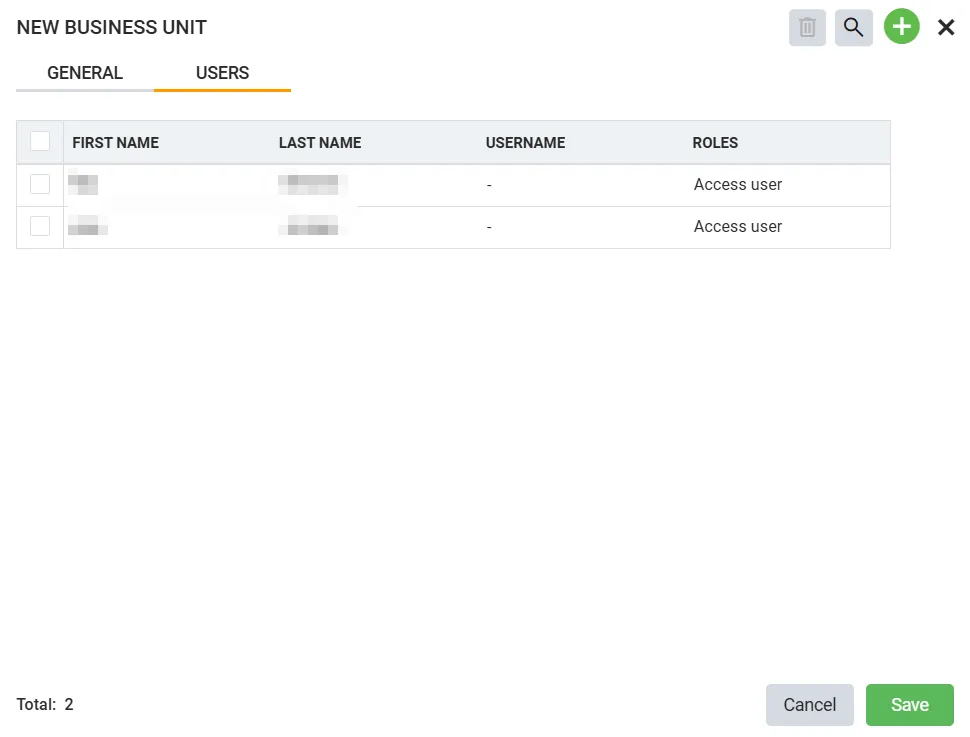
The Users tab shows all system users. Tick the checkbox next to each user you want to add as a member of this Business Unit. Use the + button in the tab toolbar to search and add specific users. A user can be a member of more than one BU.
Save
Click Save to create the Business Unit.
Edit a Business Unit
Select the Business Unit
Click the BU row in the table, or double-click the row.
Open the edit dialog
Click Edit in the toolbar. The edit dialog opens with the General and Users tabs.
Make changes and save
Rename the BU, update the description, add or remove locations using the location tree, or adjust user membership on the Users tab. Click Save.
Delete a Business Unit
Select the Business Unit
Click the BU row you want to remove.
Delete and confirm
Click Delete in the toolbar and confirm the deletion.
What happens when you delete a BU
- Locations assigned to the BU become unassigned - no longer part of any BU
- Users who were members of only this BU are no longer associated with any BU and may lose visibility into BU-scoped data
- Notifications, schedules, and reports that were scoped to the deleted BU still exist but their BU scoping is removed - accessible to Administrators only
- Child BUs are not deleted - they become parentless (top-level) BUs
Deletion cannot be undone. Review all users, locations, and data associated with the BU before deleting it.
Tips for structuring Business Units
- Start with locations: design your location hierarchy first (in Location Manager), then build your BU structure to match it
- Match your org chart: BU names that mirror your organisation’s real structure make it easier for BU Admins to understand their scope
- Use the parent hierarchy for reporting: parent BUs provide natural rollup points for reports and monitoring
- Avoid overlap: keep location assignments clean - each location in exactly one BU. Unassigned locations are visible only to Administrators