

Scheduled Reports
Scheduled Reports automate the generation and delivery of system reports. You define what data to include, who should receive the report, and on what schedule it should be sent. Reports are delivered by email to the specified recipients.
Path: Settings → Scheduled Reports
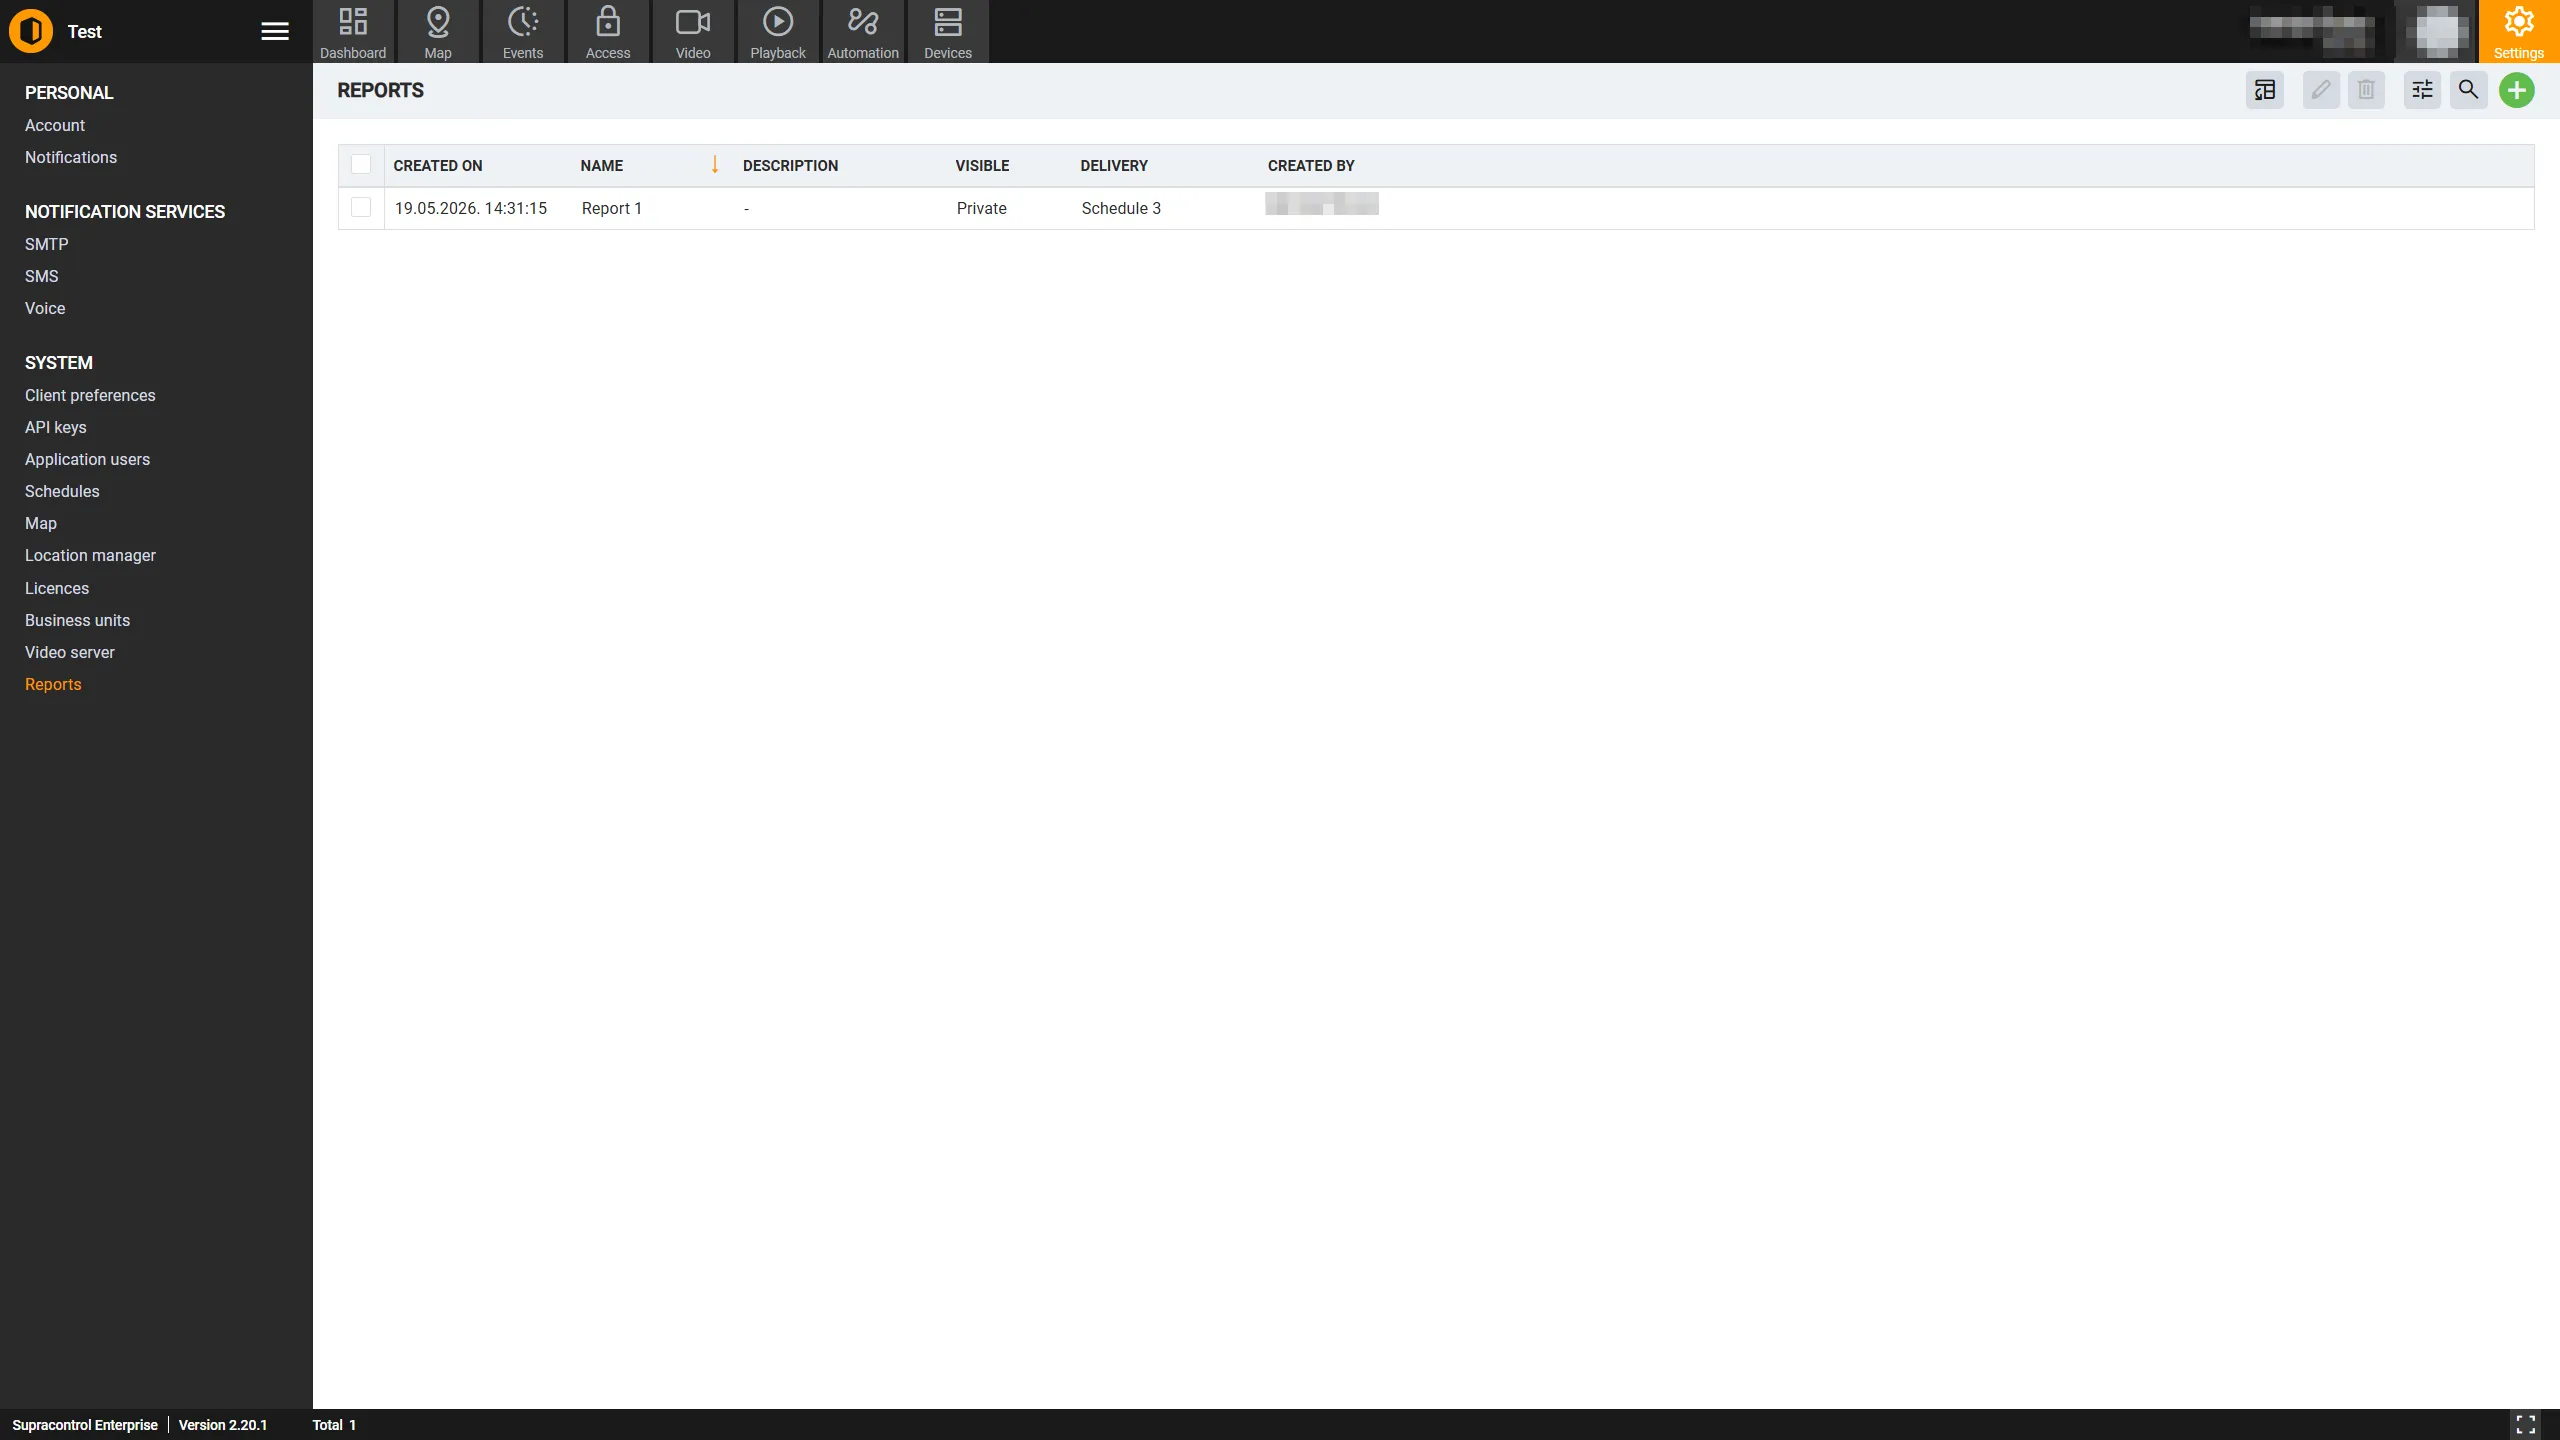
Toolbar
| Icon | Tool | Description |
|---|---|---|
 | Add Scheduled Report | Opens the dialog to create a new scheduled report |
 | Export to Excel | Downloads the scheduled report list as an Excel file. Disabled when there is no data |
 | Edit | Opens the edit dialog for the selected scheduled report. Disabled when zero or more than one row is selected |
 | Delete | Deletes the selected scheduled report. Disabled when zero or more than one row is selected |
 | Table Settings | Opens the column visibility panel. Disabled when there is no data |
A search bar is available to filter the list by name or owner.
Create a scheduled report
Open the Scheduled Reports section
Go to Settings → Scheduled Reports.
Open the creation dialog
Click the Add Scheduled Report button in the toolbar.
Enter the report name and settings
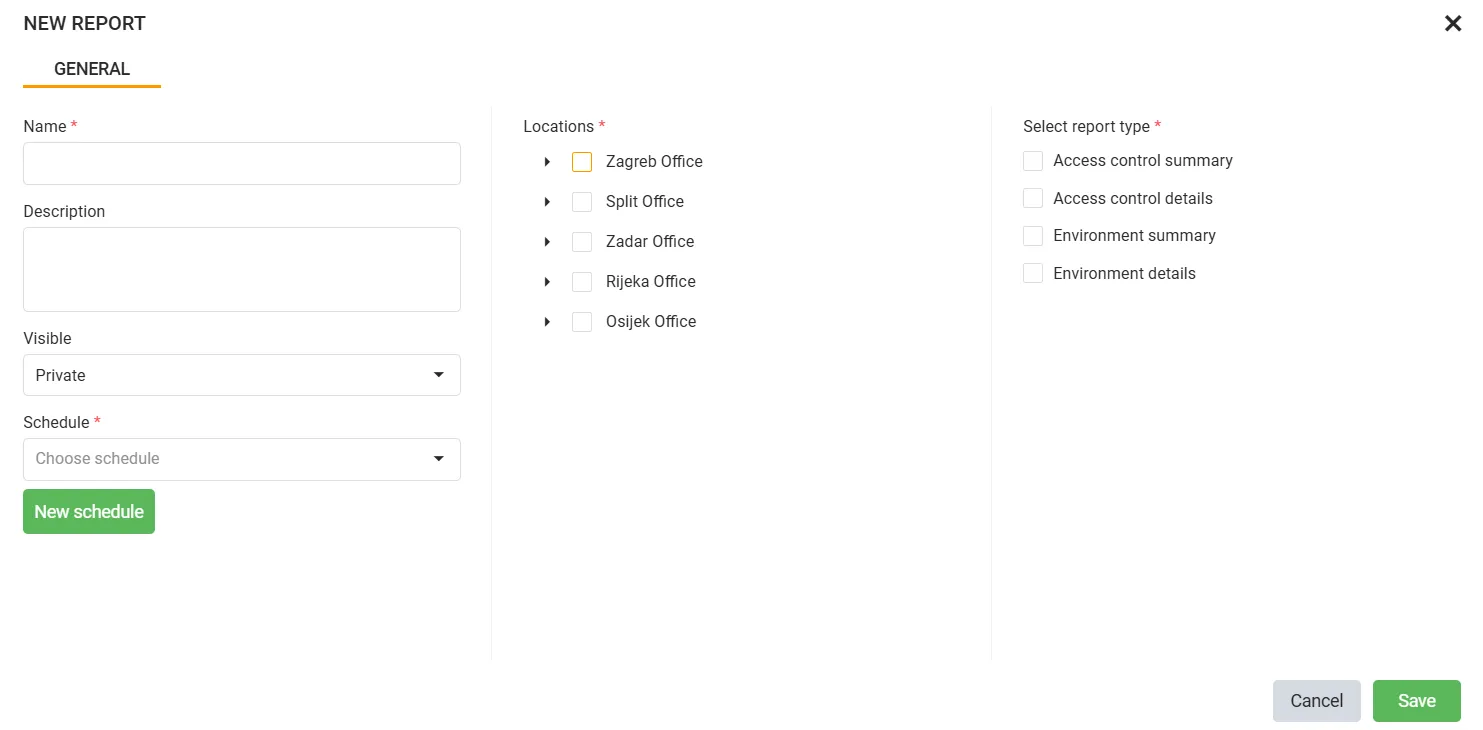
| Field | Required | Description |
|---|---|---|
| Name | Yes | A descriptive name for the report rule |
| Description | No | Optional notes about the report’s purpose |
| Visible | No | Private - visible only to you. Public - visible to all users with access to the included locations |
Select locations
Expand the location tree and tick which locations’ data should be included in the report. Only events and records from the selected locations will appear in the generated output.
Select report type
Tick one or more report types to include in the output:
| Type | Contents |
|---|---|
| Access control summary | Aggregated access event counts per user and location |
| Access control details | Full log of individual access events |
| Environment summary | Aggregated sensor readings per location |
| Environment details | Full log of individual sensor readings |
Assign a schedule
Choose an existing schedule from the Schedule dropdown - the report will be generated and sent each time that schedule’s active window opens. If you need to create a new schedule, click New schedule to do so inline.
Save
Click Save to create the report rule. The first report will be generated and delivered when the assigned schedule’s next active window arrives.
Managing recipients
Recipients can be:
- System users - select from the user list; the report will be sent to their registered email address
- Custom emails - enter any valid email address; useful for distribution lists or external recipients
You can combine both types in the same scheduled report.
Edit a scheduled report
Select the scheduled report
Click the report row you want to modify.
Open the edit dialog
Click Edit in the toolbar. The dialog opens with the current values pre-filled.
Save changes
Update the fields and click Save, or Cancel to discard.
Delete a scheduled report
Select the scheduled report
Click the report row you want to remove.
Delete and confirm
Click Delete in the toolbar and confirm the deletion.
Deletion stops future deliveries
Deleting a scheduled report immediately stops future deliveries. Already-sent reports are not affected. Only the owner (creator) of a scheduled report or an Administrator can delete it.
Privacy
A Private scheduled report is visible only to its creator. A Public scheduled report is visible to all users with appropriate access. This setting can be changed when editing.